Getting Started

Overview & FAQ

Posted by | Getting Started | No Comments

The Awesome Fitness Testimonials plugin was created to make life easier for both fitness professionals and web developers alike by letting the plugin do most of the heavily lifting: image re-sizing, coding, styling, and ordering.

Typically many fitness and wellness testimonials are created as images in a SEO unfriendly way and updating/editing require time and technical knowledge. Now with this plugin, you will be able to easily showcase your testimonials within minutes to help propel your site’s performance!

I have to mention that its design/styling functionality is currently basic, however with some HTML and CSS knowledge you can fully customize the design under the “Advanced” tab (for web developers).

And because it’s built with simplicity in mind – you might see fewer options than other testimonial plugins. It does not give you a hundred styling options BUT the testimonial format you see with this plugin has been polished for conversion.

FAQ

Where do I add the video?

You can simply add/insert it into the WordPress text editor box.

How do I change the design?

You have simple options under the “Style” tab as well as “Advanced” tab for more advanced users. For tips on how to please see.

How do I use the shortcode outside the post editor, such as in theme or template files, or in widgets?

<?php do_shortcode(' &#91;fitness-testimonials id="xx"&#93; '); ?>

Can I upload multiple images? More than two?

Currently you can only add up to 2 images.


Install

Posted by | Getting Started | No Comments

Installing Awesome Fitness Testimonials is as simple and easy as installing any other WordPress plugins.

WordPress Admin

  1. In your WordPress admin, go to: Plugins > Add New > Upload
    and Upload the .zip file of the plugin you downloaded.
  2. Activate the plugin.
  3. A new menu item “Testimonials” will appear in the admin menu for adding and configuring your testimonials.

FTP Upload

  1. Upload the ‘fitness-testimonials‘ folder to your WordPress /wp-content/plugins/ directory.
  2. Activate the plugin through the “Plugins” menu in your WordPress admin


Settings

Posted by | Getting Started | No Comments

Settings are grouped into 4 different tabs: General, Styles, Marketing, and Advanced.

  • General Settings – global settings that affect how your testimonial images and content are handled by the plugin.
  • Styles – Simple design options to change the appearance.
  • Marketing  – You will be able to add any free content between testimonials – great place to add call-to-action such as sign up button, contact form, etc. You will also have a simple option to add Facebook Like button: Above, Bottom, Above & Bottom
  • Advanced – This page includes advanced options of customizing CSS and HTML of your testimonial layout.

General

options-general-settings

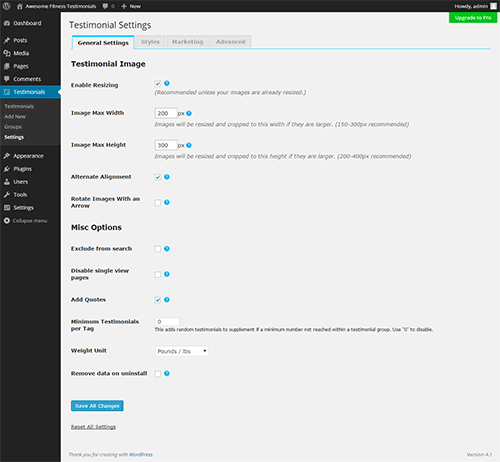
The main settings page include general settings such as image processing, content visibility, and display options that affect all of the testimonials on your site.

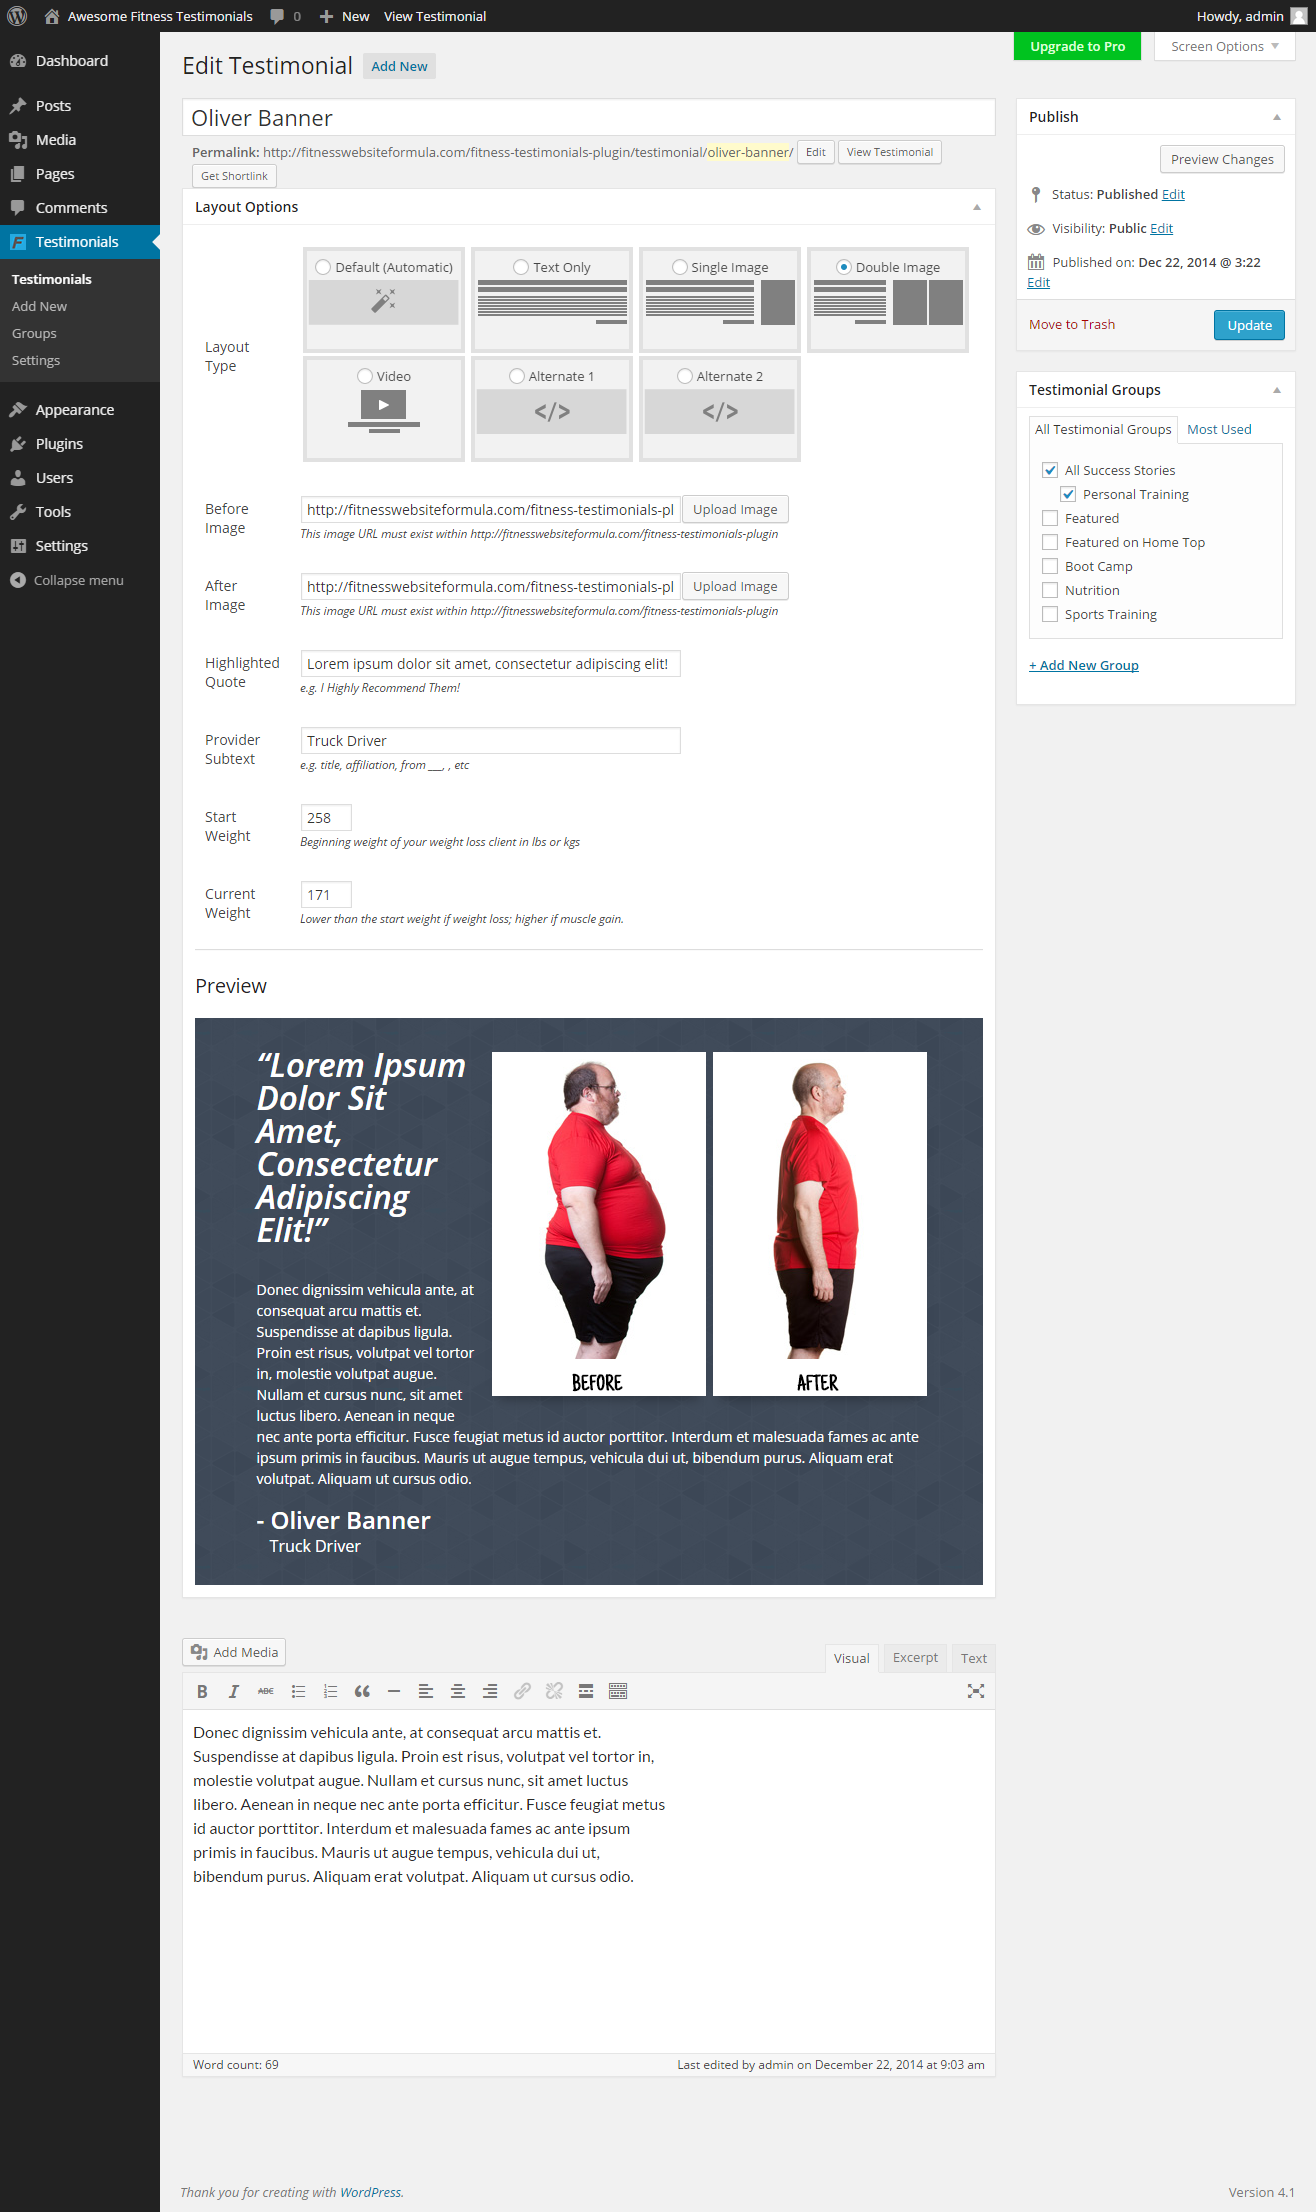
Testimonial Image Options
  • Enable Re-sizing – If enabled, the plugin can automatically re-size your images if they are larger than certain length. Otherwise your images will be displayed “as is”.
  • Image Max Width – Your images will be re-sized and cropped if they are larger than this width.
  • Image Max Height – Your images will be re-sized and cropped if they are larger than this height.
  • Alternate Alignment – Alternate image alignment between left and right
  • Rotate Images With an Arrow – When both before and after images are present, you might like to enhance the transformation with this design option.
Misc Options
  • Exclude from search – If active, testimonials and its groups (taxonomies) are excluded from search results within your WordPress site.
  • Disable single view pages – By default, the plugin generates a page for each and every testimonial you add similar to how a blog post has a single view page. However, this might not be desirable for SEO if you are not using them.
  • Add Quotes – Automatically add double quotes around your testimonial texts so you don’t have to.
  • Minimum Testimonials per Tag – You may want to make sure every testimonial group (shortcode) has certain number of testimonials. The plugin will supply testimonials from other groups if a minimum number is not met.
  • Weight Unit – If you are showing weight loss results, your measurement can be in pounds or kilograms.
  • Remove data on uninstall – Only when you want to permanently erase all of your data created with the plugin.

Styles

options-styles

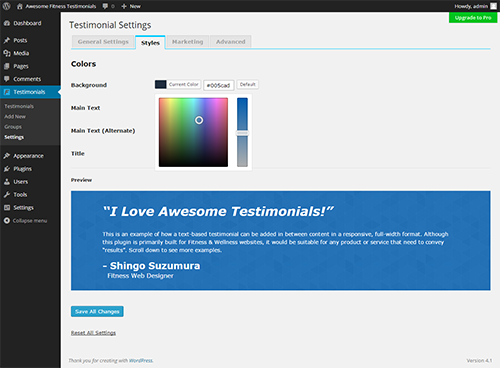
Here you can pick new colors for the box background, main text and title (quote). The preview will give you an instant feedback on what the changes will look like.

Marketing

options-marketing

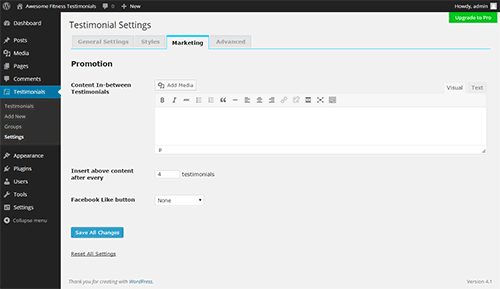
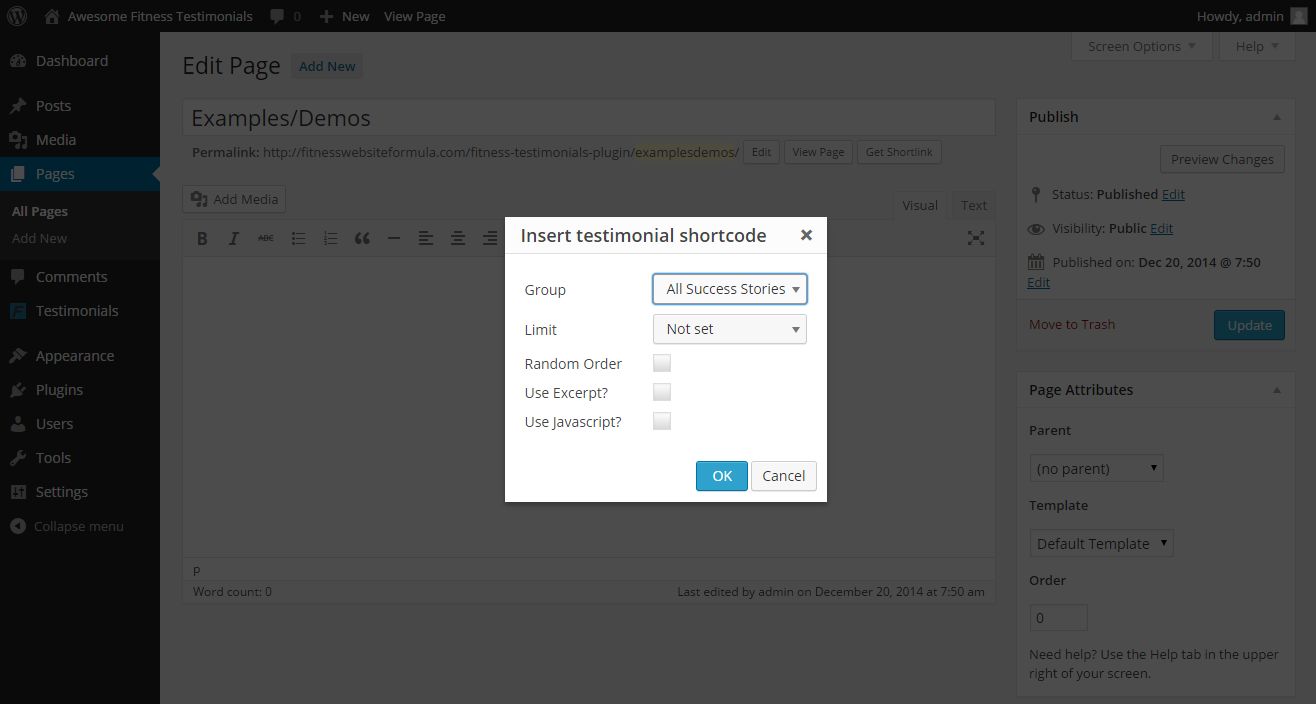
Content In-Between – You can insert your own free content between testimonial blocks at a specified interval. For example, you can add a “Free Trial” button or a “Learn More” link to your service page after every 3rd testimonial. Shortcodes work here as well.

Insert above content after every – Specify a number of testimonials for an interval to display your marketing content.

Facebook Like – Adds a simple Facebook “Like” button(s) to promote your testimonials. These can be added in one of three ways: Top, Bottom, or Top and Bottom of the testimonials.

Advanced

options-advanced

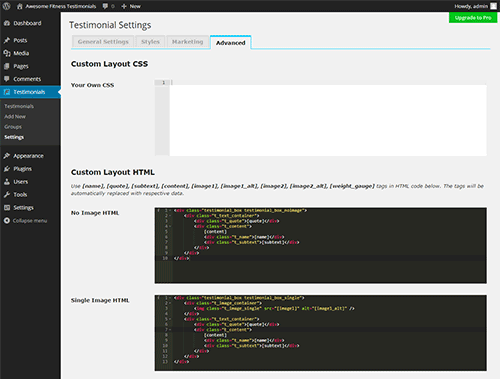
Custom Layout CSS – You can include your own custom CSS in this textarea. Your code will be included within a plugin CSS file loaded in the footer.

Custom Layout HTML – In conjunction with above, if you want to change the way your testimonial content look, you can customize the layout  HTML. These tags are automatically replaced by the respective data by the plugin: [name], [quote], [subtext], [content], [image1], [image1_alt], [image2], [image2_alt], [weight_gauge]

Last but not least, “Reset All Settings” link will revert all the settings back to default.


How to Add Entries

Posted by | Getting Started | No Comments
Add/Edit Entries

Add/Edit Entries

To add a new testimonial from the administration panel, you should select the menu Testimonials > Add New. The above page will display. This works the same way as forms for adding posts and pages.

When adding or editing a new entry, there are 7 main steps:

  1. Insert/edit the name/title for this entry.
  2. Choose a layout type or leave as default for an automatic layout detection
  3. Set images – if you have just one image, use the first image box. These images MUST exist within your WordPress site.
  4. Optionally, enter “Highlighted Quote” (i.e. I Feel So Much More Energetic!) and “Provider Subtext” (i.e. occupation, location, age, and etc)
  5. Optionally, enter start and end weights – these must be numeric value like “150” or “60”.
  6. Select group
  7. Enter testimonial video or texts in the content editor box. Enter a shorter testimonial under “Excerpt” tab for future alternate use. Press Publish/Update button.

How to Display/Showcase

Posted by | Getting Started | No Comments
Shortcode Generator

Shortcode Generator

When you are editing your page or post, you will see a tool icon like this: editor-tool-icon
Clicking on the button will bring up the screen seen above.

Group – Choose which group you want to pull your testimonials from.

Limit – If you want to limit a number of testimonials to be displayed, choose a number.

Random Order – If you want to display testimonials in an random order instead of how they are ordered in the admin panel.

Use Excerpt – If enabled and an excerpt is present, a shorter version of the testimonial texts will be displayed.

Use Javascript – If enabled, your content will be generated by Javascript and will not be crawled by search engines.